
.png)
Anna
Likholat
Running OpenVINO C++ samples on Visual Studio
Introduction
The OpenVINO™ samples provide practical examples of console applications developed in C, C++, and Python. These samples demonstrate how to leverage the capabilities of the OpenVINO API within your own applications. In this tutorial, we will guide you through the process of building and running the Hello Classification C++ Sample on Windows Visual Studio 2019 with OpenVINO 2023.0 release using Inception (GoogleNet) V3 deep learning model. The following steps outline the process:
Step 1: Install OpenVINO
Step 2: Download and Convert the Model
Step 3: Build OpenVINO C++ Runtime Samples
Step 4: Open the Solution and Run the Sample
Requirements
Before getting started, ensure that you have the following requirements in place:
- Microsoft Windows 10 or higher
- Microsoft Visual Studio 2019
- CMake version 3.10 or higher
Step 1: Install OpenVINO
To get started, you need to install OpenVINO Runtime C++ API and OpenVINO Development tools.
Download and Setup OpenVINO Runtime archive file for Windows.
- Download and extract the downloaded archive file to your local Downloads folder.
- Rename the extracted folder to “openvino_2023.0”
- Move the renamed folder to the “C:\Program Files (x86)\Intel” directory
- The "C:\Program Files (x86)\Intel\openvino_2023.0" folder now contains the core components for OpenVINO.
Configure the OpenVINO environment:
- Open the Windows Command Prompt.
- Run the following command to temporarily set OpenVINO environment variables. Please note that “setupvars.bat” works correctly only for Command Prompt, not for PowerShell.
Step 2: Download and Convert the Model
To successfully execute the "hello_classification” sample, a pre-trained classification model is required. You can choose a pre-trained classification model from either public models or Intel’s pre-trained models from the OpenVINO Open Model Zoo. However, before using these models in the "hello_classification" sample, they need to be downloaded and converted into the Intermediate Representation (IR) format using the Open Model Zoo tools. Following are the steps to install the tools and obtain the IR for the Inception (GoogleNet) V3 PyTorch model:
- Install OpenVINO Development Tools which include the necessary components for utilizing the Open Model Zoo Tools.
NOTE: Ensure that you install the same version of OpenVINO Development Tools as the OpenVINO Runtime C++ API. For more details, see these instructions.
- Next, execute the following commands to download and convert the googlenet-v3-pytorch model as an example:
NOTE: The googlenet-v3-pytorch IR files will be located at:
CURRENT_DIRECTORY\public\googlenet-v3-pytorch\FP32
Or you can specify the location of the model using:
Step 3: Build OpenVINO C++ Runtime Samples:
To build the OpenVINO C++ Runtime samples, follow these steps:
- In the existing Command Prompt where OpenVINO environment is setup, navigate to the "C:\Program Files (x86)\Intel\openvino_2022.3\samples\cpp" directory.
- Run the build_samples_msvc.bat script. By default, the script automatically detects the Microsoft Visual Studio installed on the machine and uses it to create and build a solution.
Step 4: Open the Solution and Run the Sample.
To open and run the Hello Classification sample in Visual Studio, follow these steps:
- Start the Visual Studio using Command Prompt:
- In Visual Studio, choose "Open a project or solution" from the menu and navigate to the following solution file:
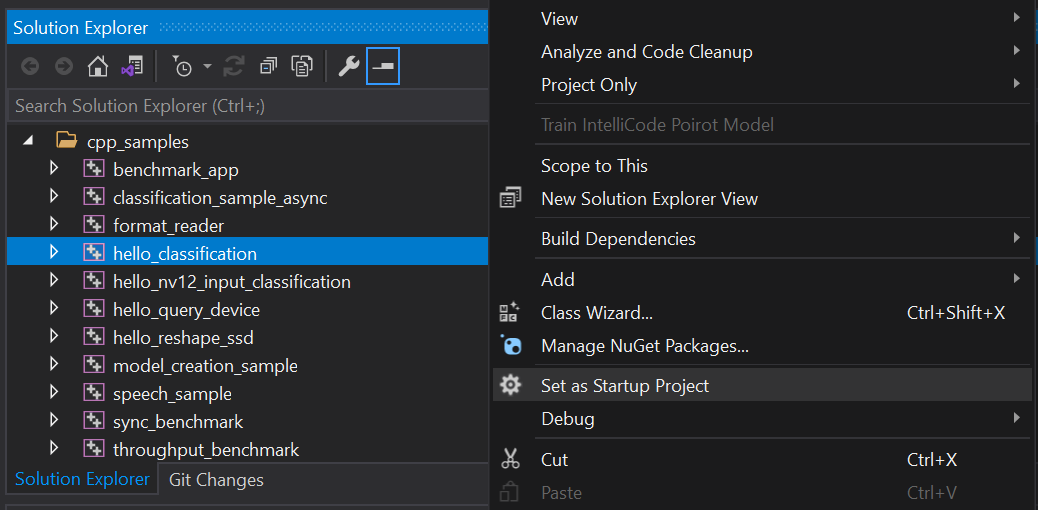
- Set the "hello_classification" project as the startup project (see Figure 1).
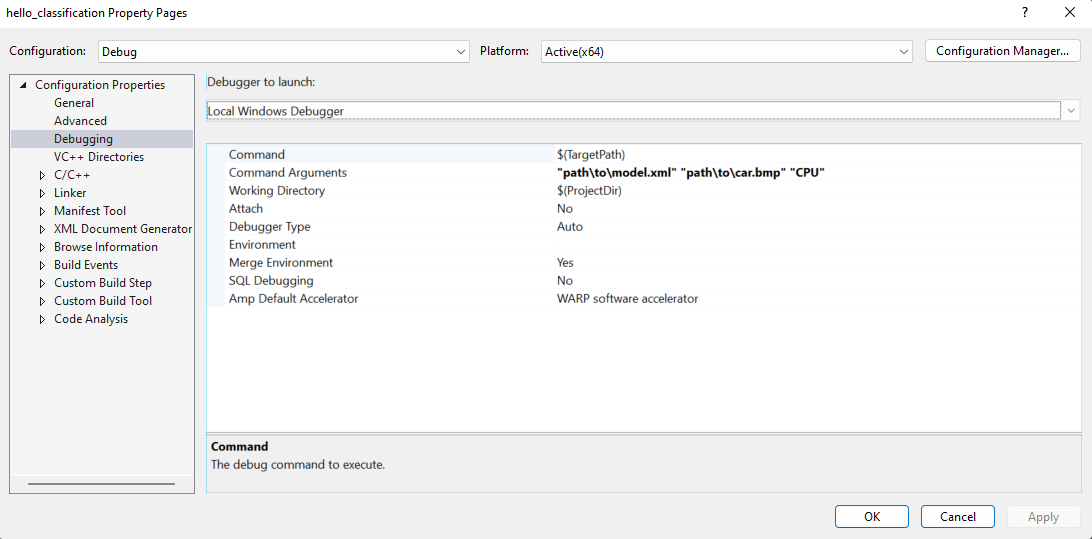
- To run the sample, you need to specify a model and image:
- Navigate to: project properties->Configuration properties->Debugging->Command Arguments
- Add command line arguments for the path to model, path to input image and device name (see Figure 2).
- You can use images from the media files collection available at test_data
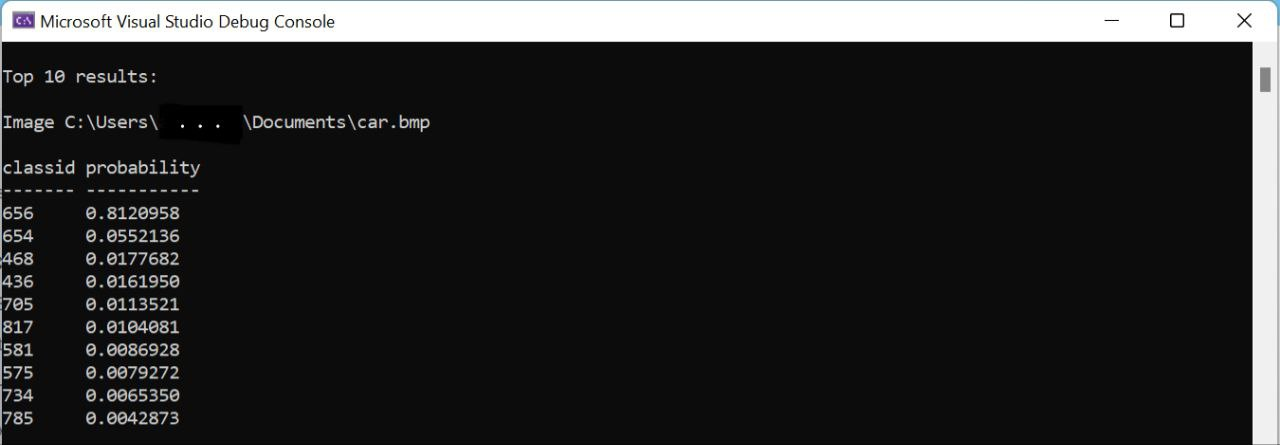
- Apply the changes and run the application. The application will output the top-10 inference results (see Figure 3).
Additional Resources:
For more information and detailed instructions, refer to the following resources: