.png)
Wenyi
Zou
Intel® DL Streamer Optimize Media-AI pipeline on Intel® Data Center Flex dGPU by Docker
Authors Kunda Xu, Wenyi Zou
Introduction
In this blog is about How to use DL-streamer to build a complete Media-AI pipeline (Including: Video Access, Media Decode, AI Inference, Media Encode and Result Export). And the pipeline will be accelerated by OpenVINO™ and optimize to run on Flex dGPU(Intel® Data Center Flex dGPU)
Requirement
- DL-streamer
Intel® Deep Learning Streamer (Intel® DL Streamer)Pipeline Framework is an easy way to construct media analytics pipelines using Intel® Distribution of OpenVINO™ Toolkit. It leverages the open source media framework GStreamer to provide optimized media operations and Deep Learning Inference Engine from OpenVINO™ Toolkit to provide optimized inference.
- OpenVINO
OpenVINO™ is an open-source toolkit for optimizing and deploying AI inference which can boost deep learning performance in computer vision, automatic speech recognition, natural language processing and other common task.
- Docker (Optional)
Docker is an open-source platform that enables developers to build, deploy, run, update, and manage containers—standardized, executable components that combine application source code with the operating system (OS) libraries and dependencies required to run that code in any environment.
Install DL-Streamer and OpenVINO™ via Docker
Images for Intel® Data Center GPU Flex Series
Images 2023.0.0-ubuntu22-gpu682* are intended for Intel® Data Center GPU Flex Series and include
3. Drivers for Intel® Data Center GPU Flex Series, drivers version 682.14
Two images are listed below, images -devel additionally contain samples and development files
Runtime image that includes GStreamer* Pipeline Framework elements, elements built with Intel® oneAPI DPC++/C++ Compiler
Developer image that builds on runtime image containing samples, development files and a model downloader, built with Intel® oneAPI DPC++/C++ Compiler
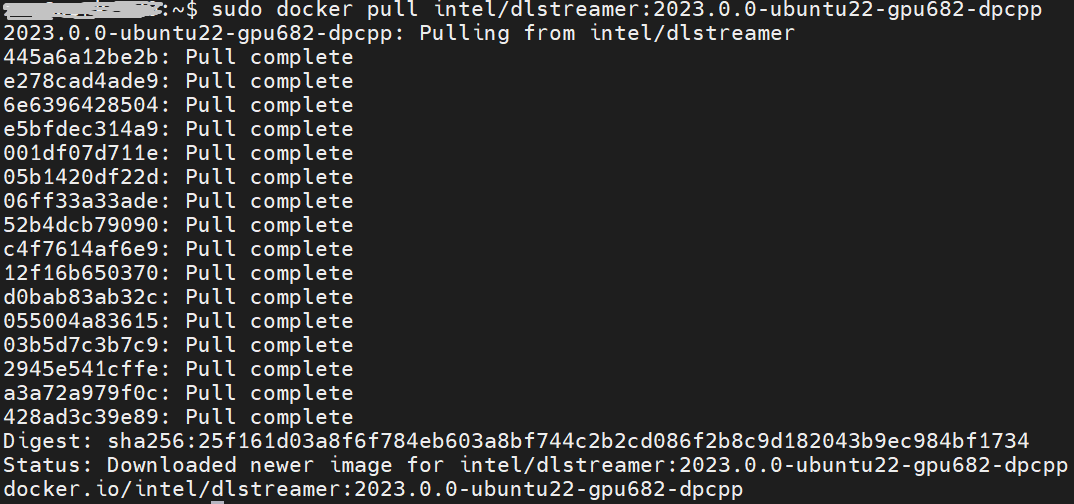
Taking “dlstreamer:2023.0.0-ubuntu22-gpu682-dpcpp” docker images as a sample to show how to pull the docker image from docker hub.
DL-Streamer Media-AI pipeline quick start example
Make sure the pre-requirement had already installed, there is a very basic introduction to using object detection models(yolov5) to build a DL-streamer pipeline.
Step 1.Download video and yolov5s model file
Download video
Download yolov5s-416_INT8 model from pipeline-zoo-models
Step 2.Enter Docker and copy the files into docker container
Create and enter the docker container
Open another terminal for file copy into container ,copy video and model into docker container
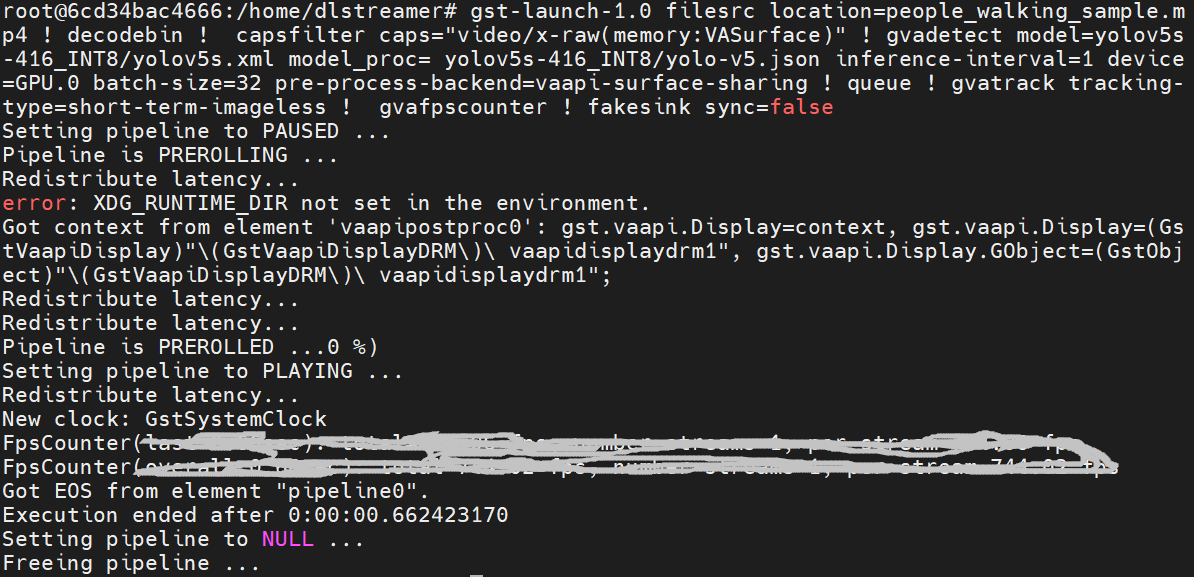
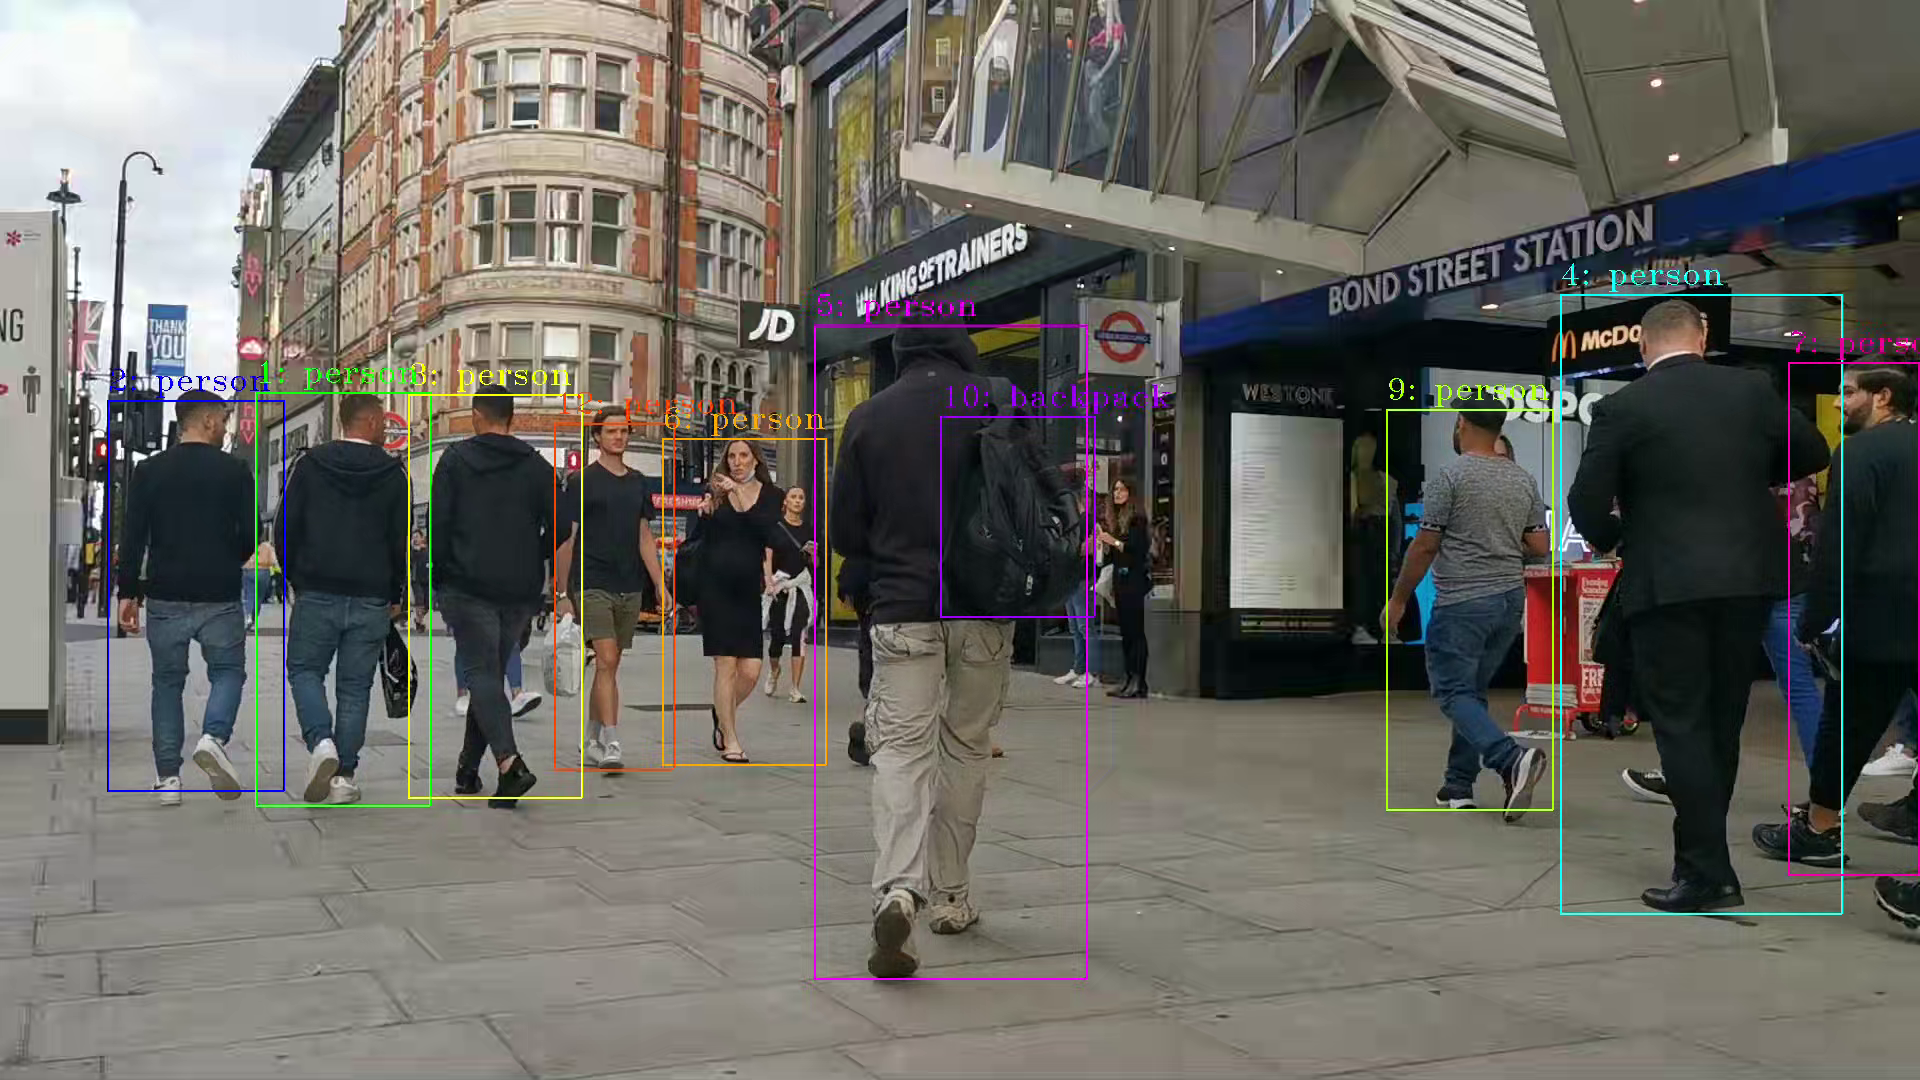
Step 3. Run an object detection Media-AI pipeline
By the following script, we can run pipeline the Media-AI objection detection on the Flex dGPU in the docker container.
If want to encode the detection result and save as video file, can use the follow script
The encoded video file will save in the container and can be copied out in new terminal.
PS. Instruction about DL-streamer CLI parameter
decodebin: Auto-magically constructs a decoding pipeline using available decoders and demuxers via auto-plugging.
vaapipostproc: Consists in various post processing algorithms to be applied to VA surfaces. For e.g. scaling, deinterlacing (bob, motion-adaptive, motion-compensated), noise reduction or sharpening.
gvadetect: Performs object detection on a full-frame or region of interest (ROI) using object detection models such as YOLO v3-v5, MobileNet-SSD, Faster-RCNN etc. Outputs the ROI for detected objects.
gvatrack: Performs object tracking using zero-term, zero-term-imageless, or short-term-imageless tracking algorithms. Zero-term tracking assigns unique object IDs and requires object detection to run on every frame. Short-term tracking allows to track objects between frames, there by reducing the need to run object detection on each frame. Imageless tracking forms object associations based on the movement and shape of objects, and it does not use image data.
gvafpscounter: Measures frames per second across multiple streams in a single process.
Tuning Tips
Users can refer the different platform using case which were supported by OpenVINO™ and the device profiling API to realize performance tuning of your inference program between CPU, iGPU, dGPU. It will also be helpful to developer finding out the place where has the potential space of performance improvement.